
Developer Disk Cleanup
How to Clear npm Cache on Windows and Mac
Free up space used by npm's download cache without removing installed dependencies. Check its size with MangoDisk or use npm cache clean --force.

An old project may be gone, but the packages npm downloaded for it can still be sitting in the cache. Deleting a project folder doesn't necessarily remove that separate download data.
You can clear npm's download cache without removing your project's node_modules. With a normal cache configuration, this doesn't uninstall dependencies or require a fresh Node.js installation. Future package installs may need to download the data again.
MangoDisk makes it easier to see whether that's worth doing. It lists npm and other supported developer caches with their sizes, so you can compare them without hunting through hidden folders.
Check the size before clearing it
Open Deep Cleanup, run a scan, and find the npm cache entry. Expand it to review its path, size, and cleanup notes.
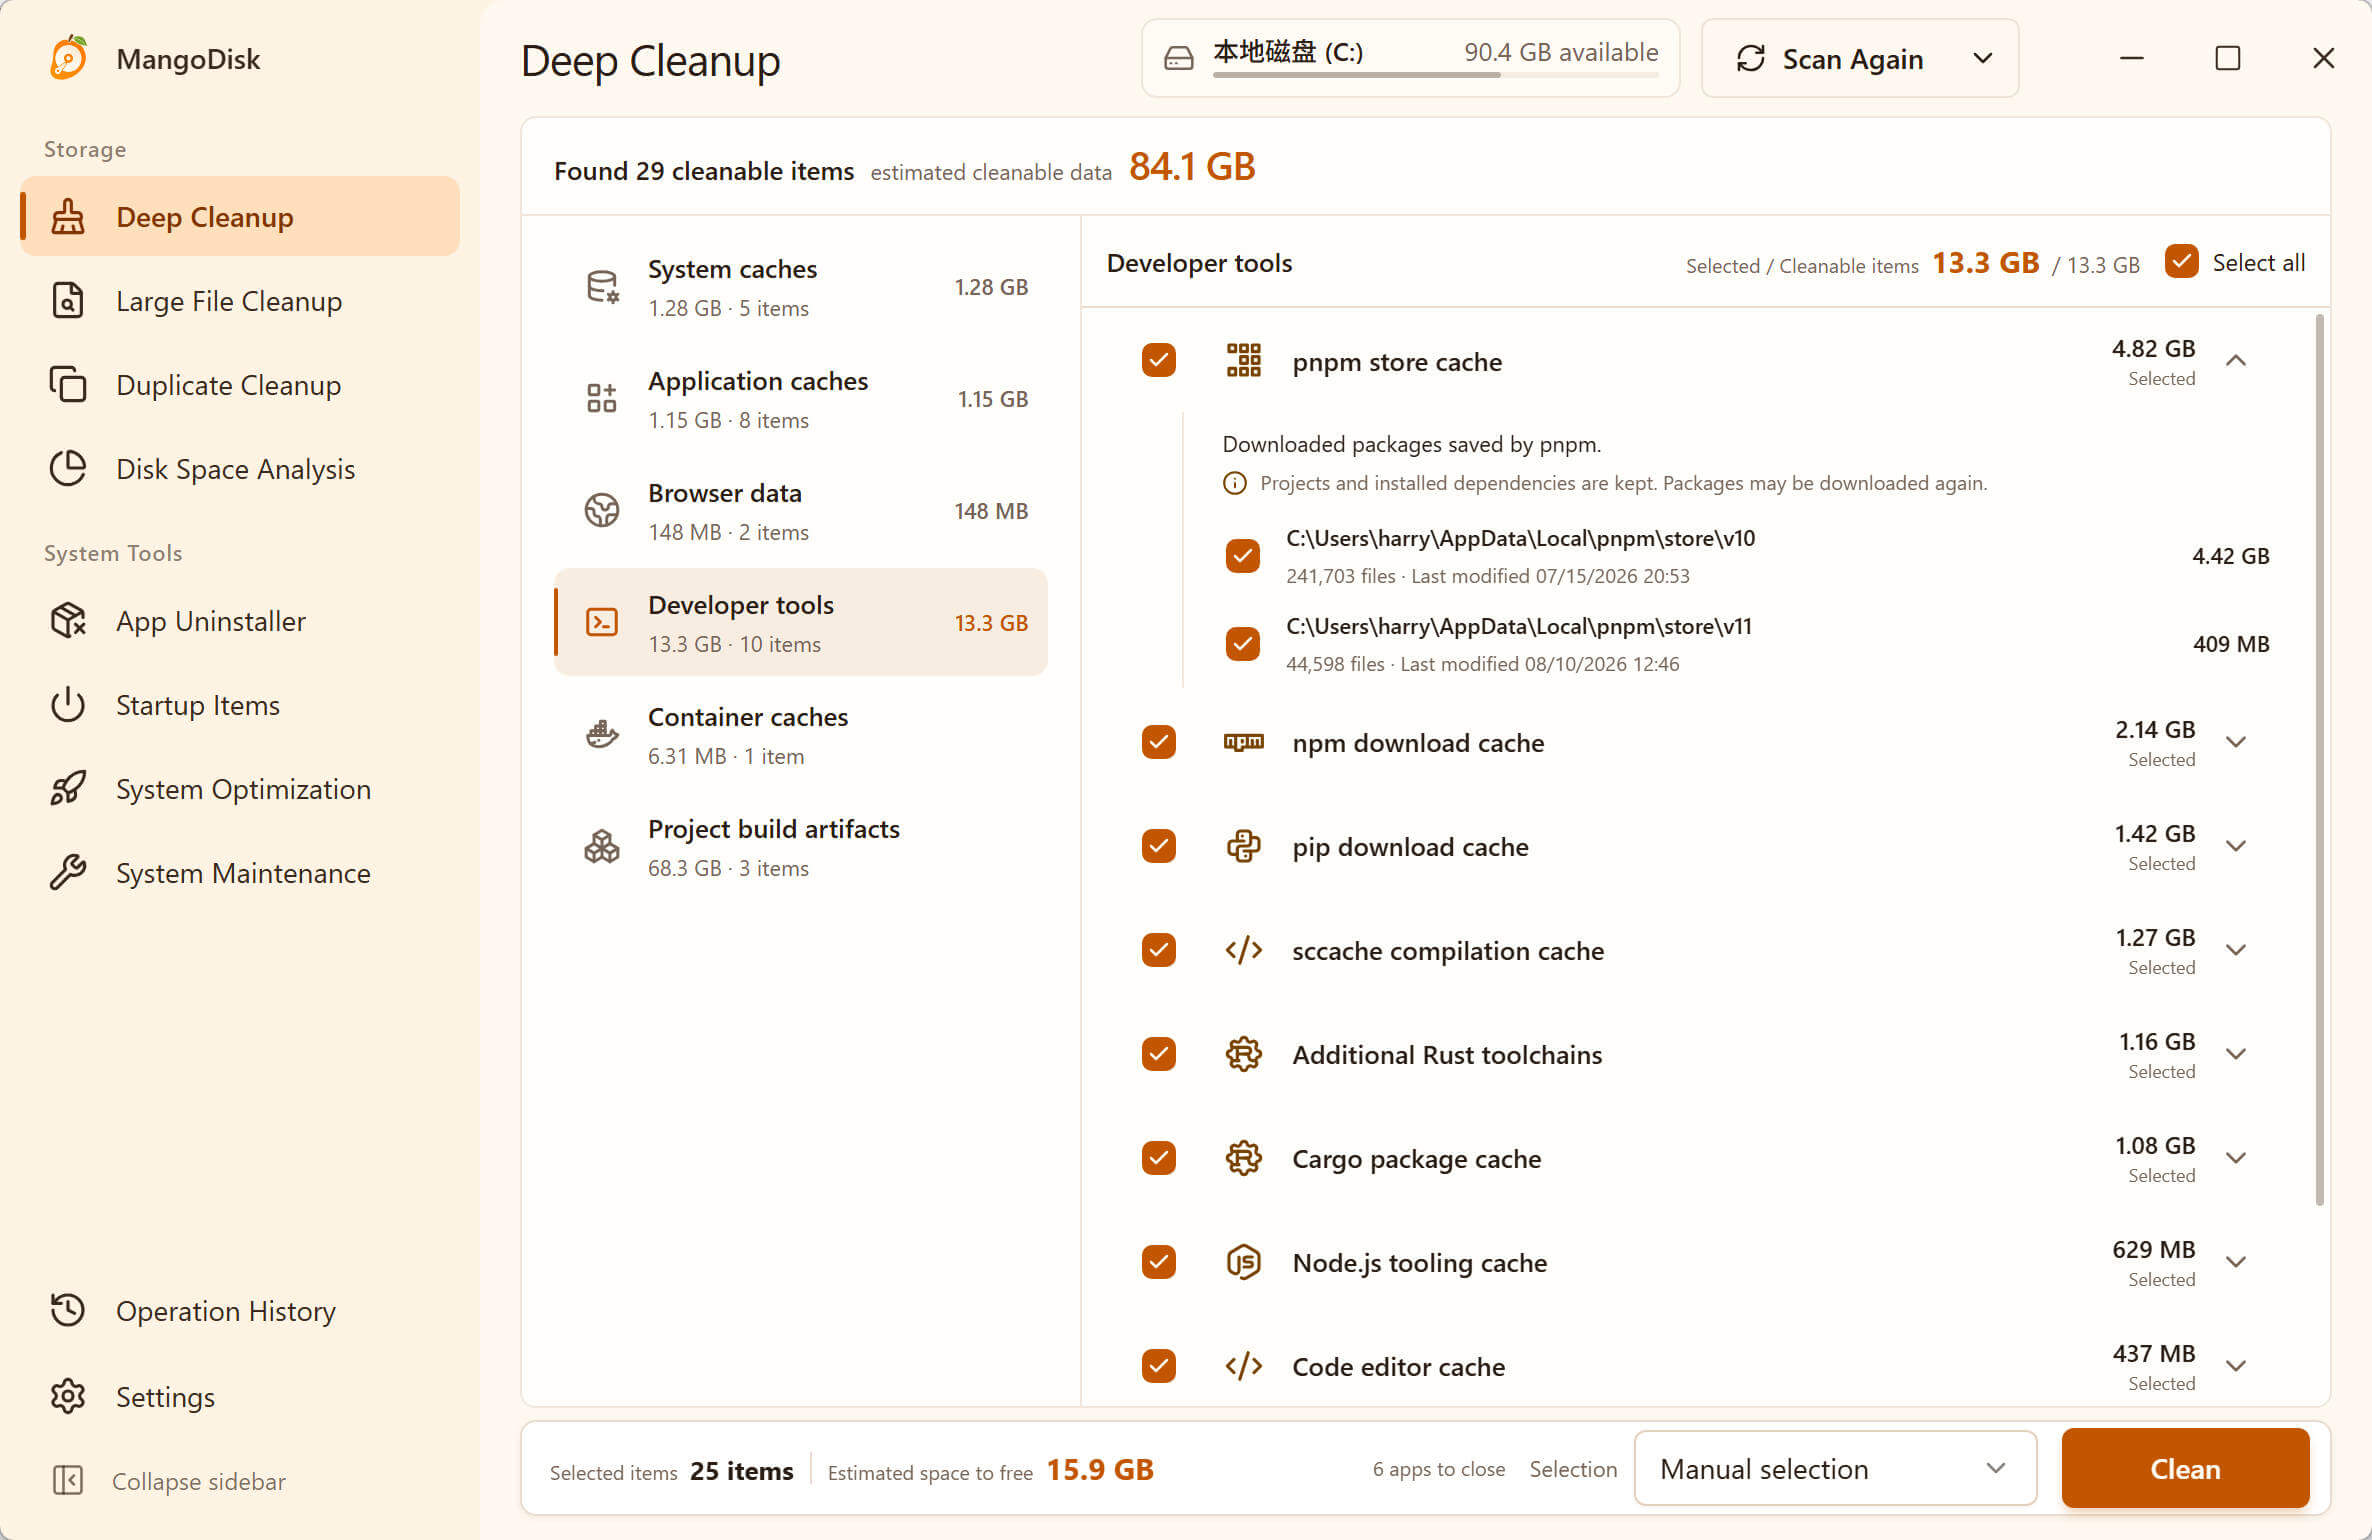
To clean only npm, deselect the other results and select the npm cache you want to remove. Wait for package installations and related tasks to finish, then check the selected paths and estimated space before confirming cleanup. Scanning alone doesn't delete anything.
MangoDisk's built-in rules cover common npm cache locations on Windows and ~/.npm/_cacache on macOS. If you've changed your npm cache location, check the configured path using the command below. An empty scan result doesn't prove there's no cache elsewhere.
npm cache isn't the same as node_modules
The cache keeps downloaded package data for reuse. node_modules contains the dependencies installed for a project. npm's folder documentation describes these as separate locations.
| Item | What it holds | What clearing the npm download cache does |
|---|---|---|
| npm download cache | Data that can be reused during installation | Removes that cached data; future installs may download it again |
A project's node_modules | Dependencies used to run or build the project | Doesn't uninstall them |
| Globally installed tools | Packages installed with npm install -g | Doesn't uninstall them |
Source files, package.json, and package-lock.json | Your code, dependency declarations, and locked versions | Leaves them alone; they aren't cleanup targets |
This assumes the cache and your project files are stored separately. If you've configured a cache folder that also contains personal files, sort out that setup before clearing it.
Don't delete package-lock.json just to clear the cache. It records the resolved dependency tree; removing it can change the versions you get on a later install.
Clear npm cache from the command line
In PowerShell on Windows or Terminal on macOS, first check which cache folder npm is using:
npm config get cache
This reads the configuration without deleting files. The default is usually %LocalAppData%\npm-cache on Windows or ~/.npm on macOS. Open the returned folder in File Explorer or Finder to check its size.
If you want to check the cache and reclaim unneeded entries first, use:
npm cache verify
verify isn't read-only: it also removes unneeded cache data. It isn't a command to force-clear the entire cache.
If you need the space and can download packages again, wait for ongoing installs and related tasks to finish, then run:
npm cache clean --force
This deletes npm's download cache without sending it to the Recycle Bin or Trash. npm requires --force because its cache normally handles integrity problems itself; routine clearing isn't necessary. See the npm cache documentation for the command's behavior.
The next install may be slower, not faster. Keep the cache if you're about to work offline or can't currently download the private packages you use. A cache isn't a backup, but there's no benefit in deleting data you still need just to follow a cleanup routine.
Still short on space? Check the project folders
Clearing downloads leaves old projects' node_modules folders in place. That's one reason a successful cache cleanup can make only a small dent in disk usage.
Switch to MangoDisk's Disk Space Analysis and select the drive or folder containing your projects. Larger rectangles mean more space used. Open a folder to compare its contents without checking each project's properties separately.
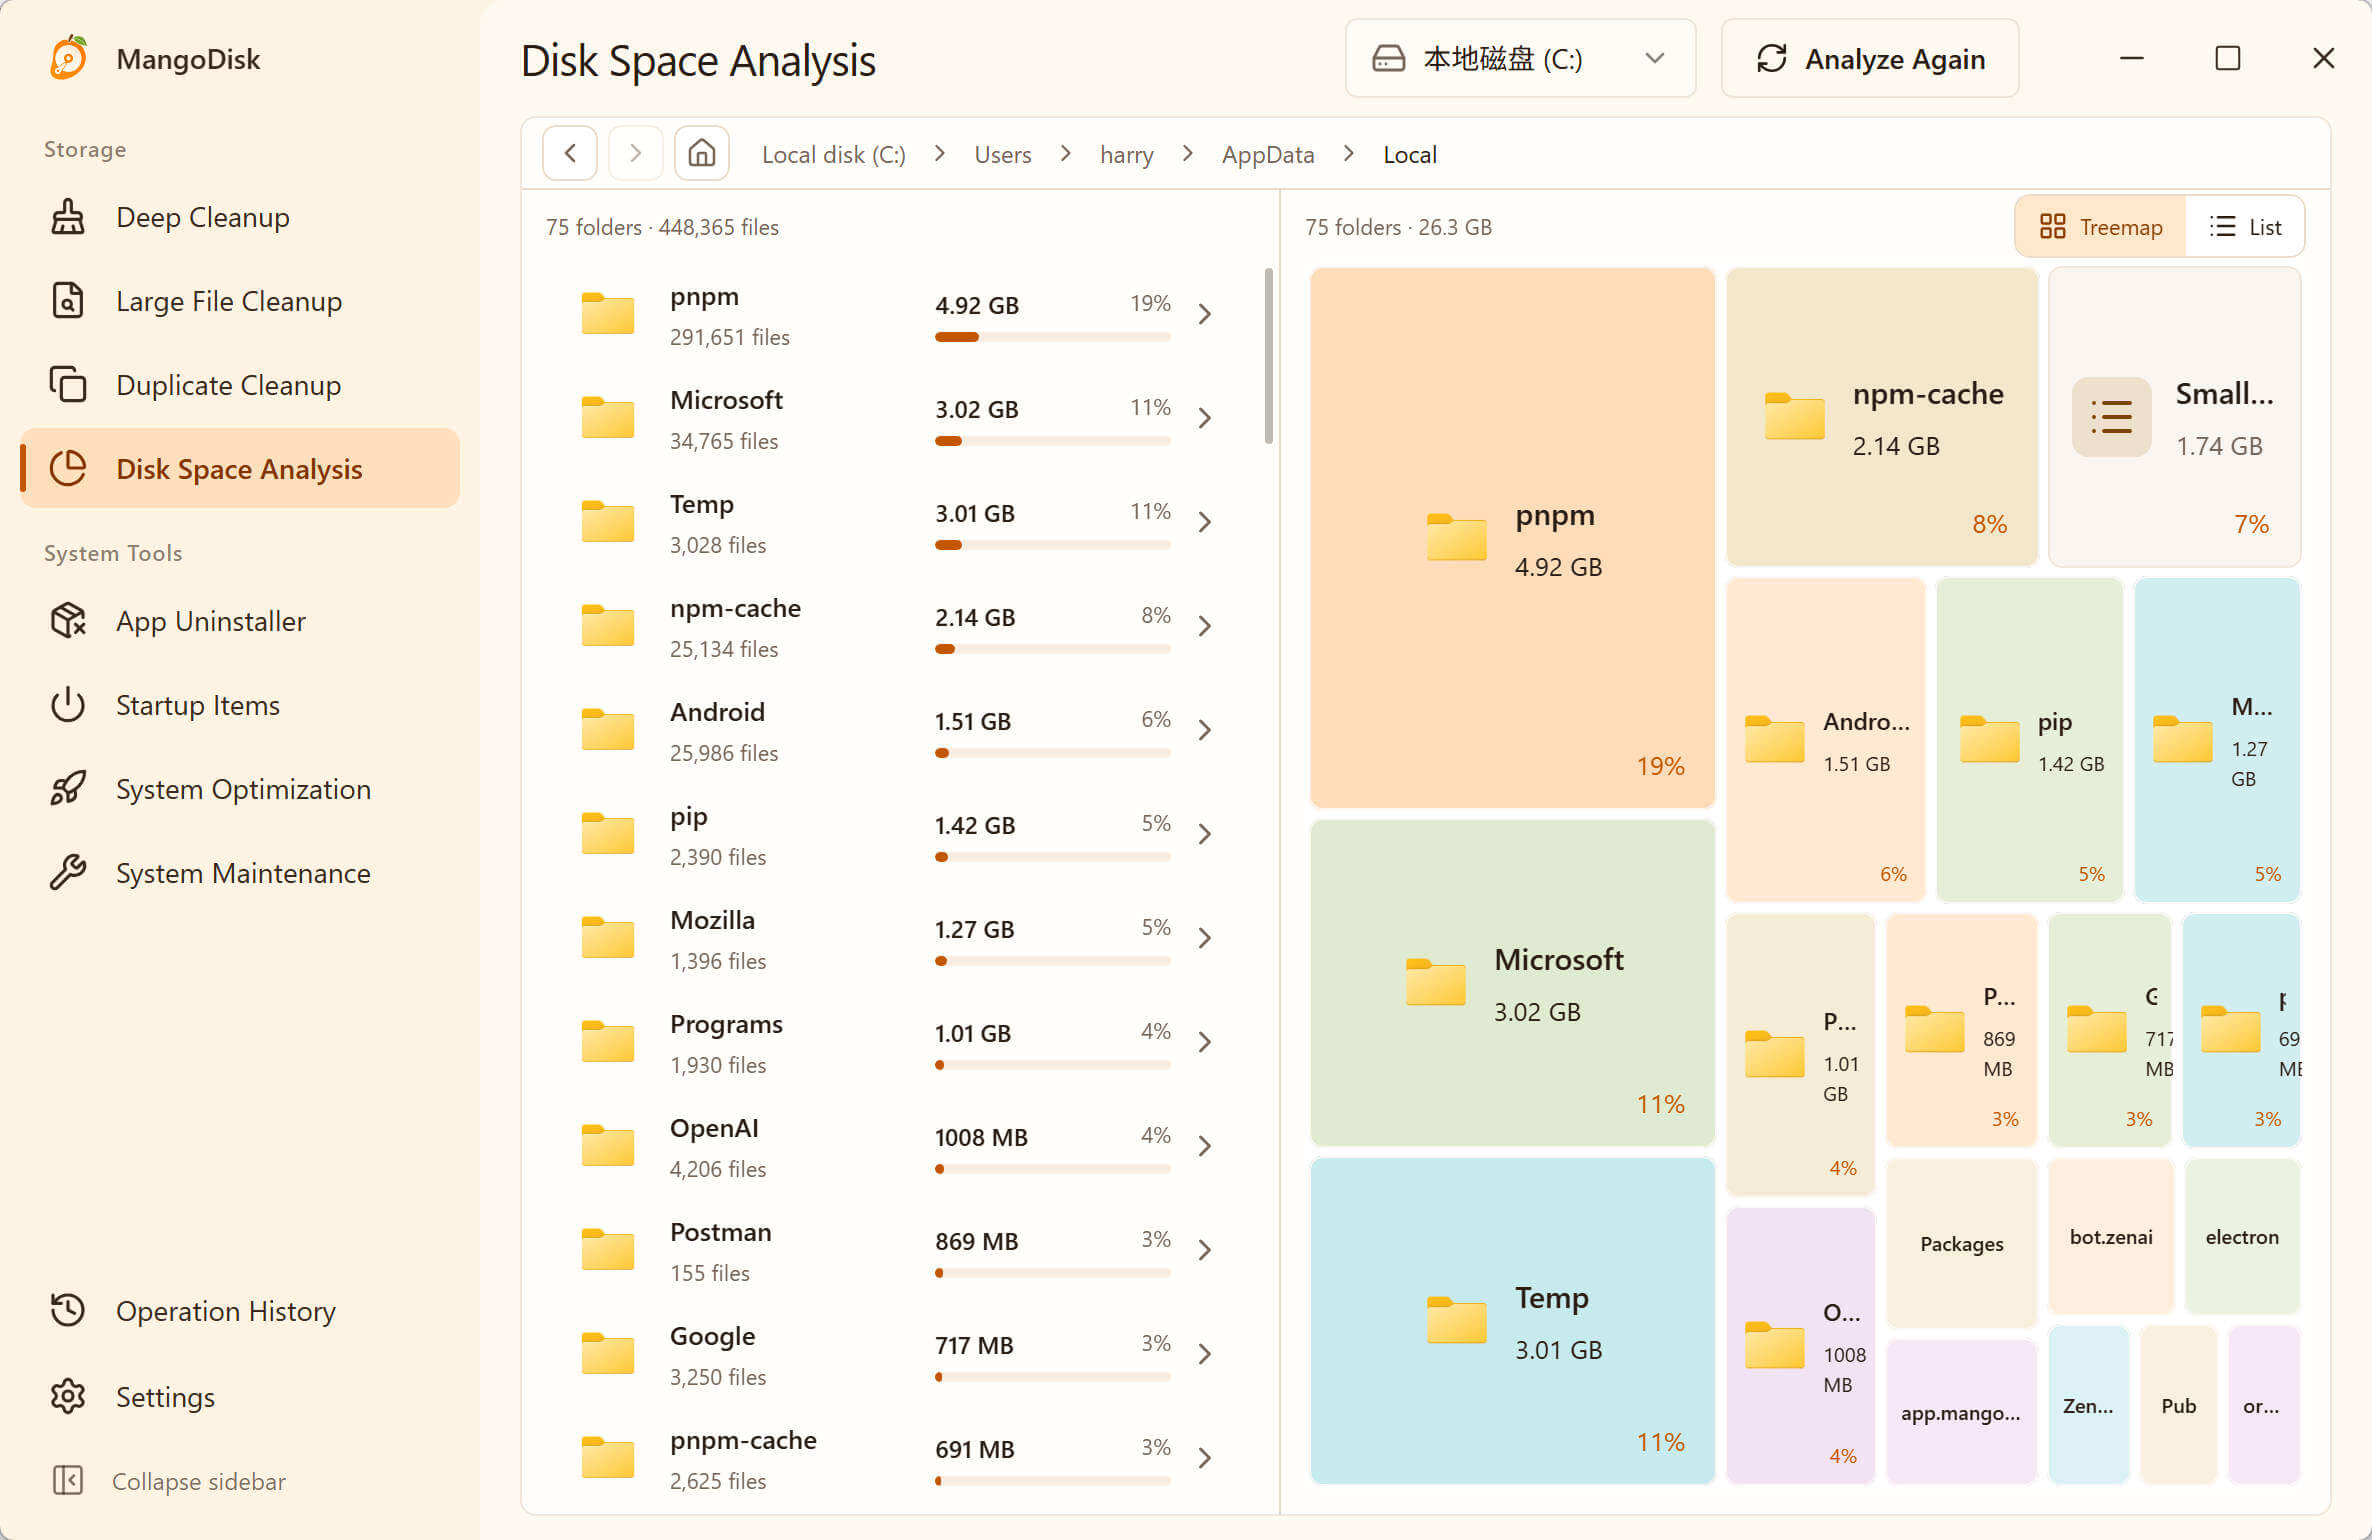
If unused project dependencies are taking most of the space, return to Deep Cleanup and review the supported project build artifacts. Removing those dependencies is a separate decision from clearing npm's download cache. You'll need to reinstall them before running the project again. Keep your source and lockfiles, and save any changes you made inside dependency folders first. Leave active projects alone if you don't want to reinstall their dependencies.
A large folder isn't automatically disposable. Manual deletion in Disk Space Analysis is permanent and bypasses the Recycle Bin or Trash. Keep anything you're unsure about; the cleanup safety guide explains the safeguards and limits.
Compare caches in one place
For a single npm cache, the command line does the job. MangoDisk is useful when you also want to see what other tools and old projects have left behind, compare sizes, and choose where to start.
Download MangoDisk and run a scan. It's free and open source, works on Windows and macOS, and needs no signup or login. The scans and cleanup actions described here run locally; AI is optional and isn't needed for them.
Related: Review Codex disk usage · Cargo cache vs. the target folder