
How to Clear the VS Code Cache
Check VS Code cache sizes and paths with MangoDisk on Windows and Mac, then clear what you don't need. Includes manual steps and folders to leave alone.

VS Code stores more than just its installation files on your drive. Downloaded extension packages, interface caches, and generated runtime files live in your user data folder. You can clear these without uninstalling the editor or reinstalling your extensions.
Save your work and quit VS Code before clearing specific cache folders. Some files will be generated again on the next launch, and extension packages may need to be downloaded again. Don't delete the entire Code folder: it contains user data as well as caches.
If you'd rather not track down each folder, MangoDisk can show the cache sizes and paths first, so you can choose what to clear.
Check and clear VS Code caches with MangoDisk
Open MangoDisk's Deep Cleanup, run a scan, and look under “Developer tools”:
- Windows: expand “Code editor cache” and check the cache paths inside the
Codefolder. - Mac: expand “Visual Studio Code cache” to see the cache folders and their sizes.
The results put paths and sizes in one view. You don't have to locate AppData or Library and check each folder's properties just to find out which caches are worth clearing.
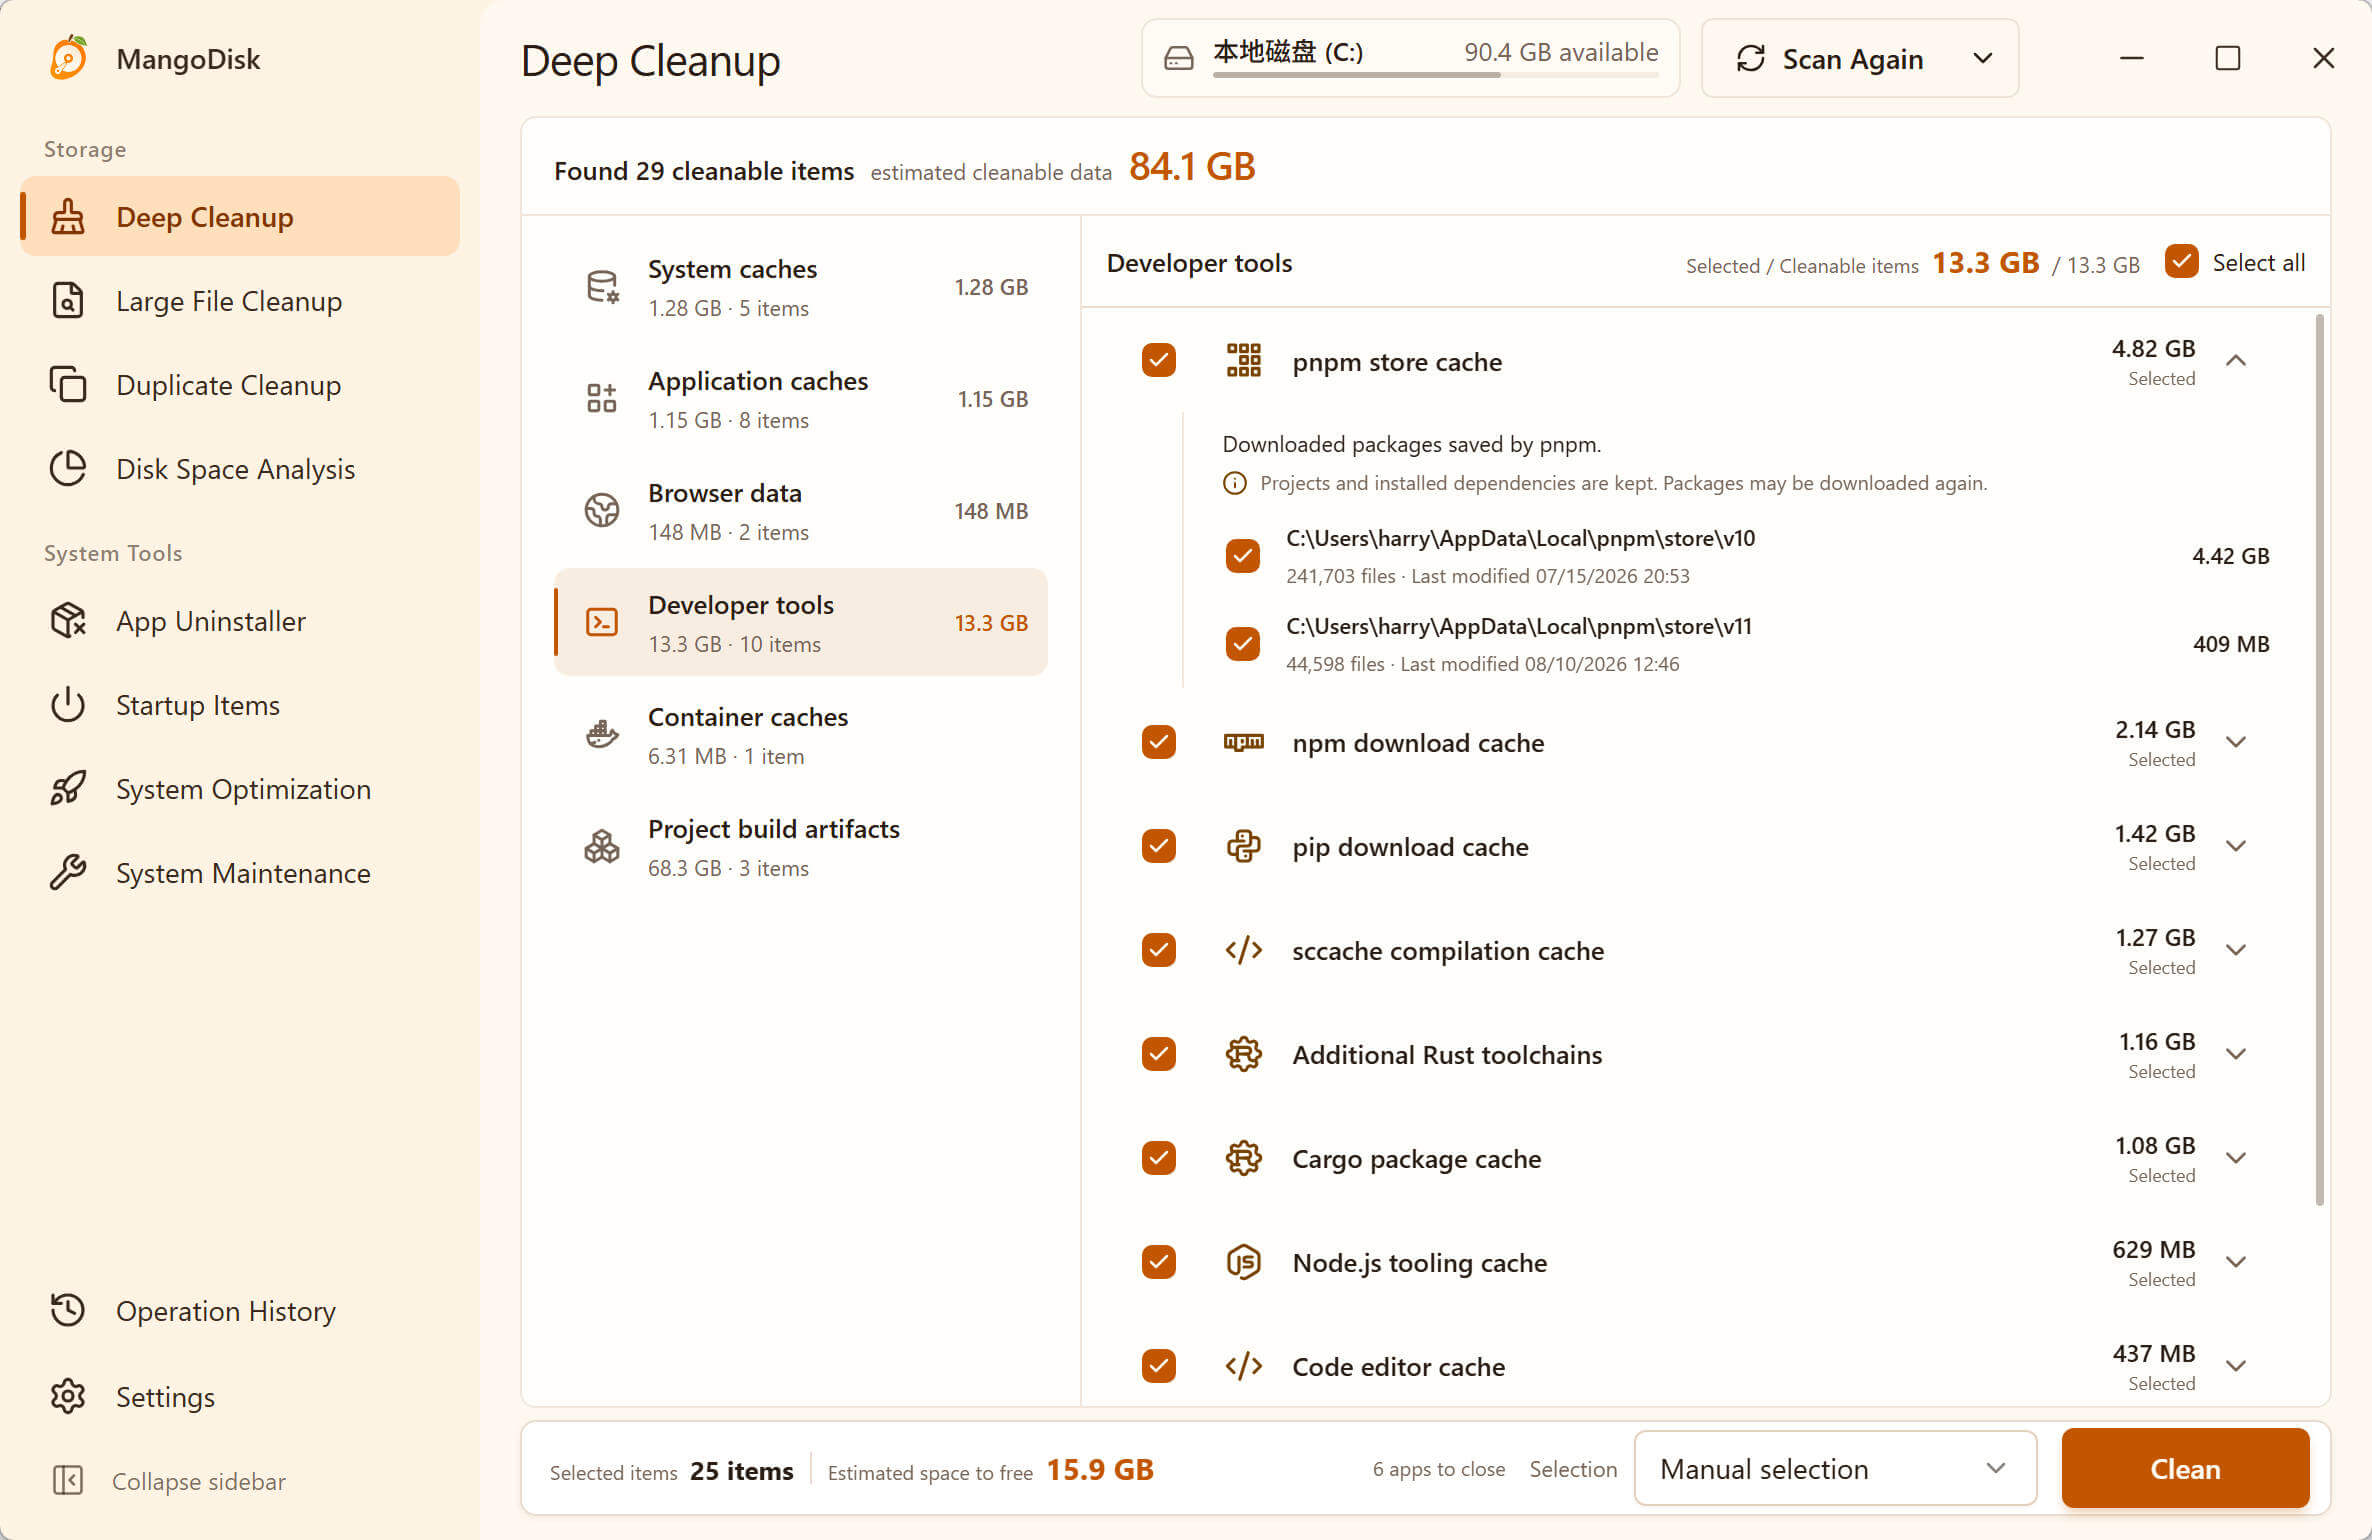
Before clearing files:
- Save your files, stop running tasks, and quit VS Code. On a Mac, quit the app rather than just closing its window.
- Deselect unrelated items and select only the VS Code cache paths you've checked. The Windows “Code editor cache” group can also contain Cursor, Windsurf, and other editors, so don't select the whole group if you only want to clear VS Code.
- Review the estimated space to recover and the apps that need to close, then confirm. Scanning alone doesn't delete anything.
This cleanup doesn't treat the entire VS Code user data folder as disposable. On Windows, the entry also includes logs and crash reports. Deselect those paths if you still need the files for troubleshooting.
Deletion is permanent and bypasses the Recycle Bin or Trash. Check the selected paths first and keep anything you're unsure about. See the cleanup safety guide for recovery limits.
Clear the VS Code cache manually
A standard installation uses these default user data locations:
| System | Default directory | How to open it |
|---|---|---|
| Windows | %APPDATA%\Code | Paste it into File Explorer's address bar |
| macOS | ~/Library/Application Support/Code | Press Shift + Command + G in Finder and paste the path |
Quit VS Code before opening the directory. Check the sizes of these folders and clear their contents only if you need the space:
| Folder | What it contains |
|---|---|
Cache, Code Cache, GPUCache | Interface and generated runtime caches |
CachedData | Generated code cache, not your project's source files |
CachedExtensionVSIXs | Downloaded extension installation packages, not the installed extensions themselves |
On Windows, right-click a folder and open “Properties.” On a Mac, select it and press Command + I. If you decide to clear it, delete only the contents of the cache folder—not the enclosing Code directory. Back up anything you're unsure about first.
Leave User, Backups, Local Storage, and the .vscode/extensions folder in your home directory alone. They aren't part of the cache cleanup described here. VS Code's official uninstall guide describes deleting the entire user data directory as a clean uninstall or reset, not routine cache cleanup.
Removing packages from CachedExtensionVSIXs doesn't uninstall your extensions. Packages can be downloaded again when needed, but keep a copy if you rely on them for offline installation. See VS Code's extension download cache explanation.
These paths apply to the stable release using its default locations. Insiders, Portable mode, or a custom --user-data-dir can use different paths. MangoDisk's rules described above don't guarantee coverage of those locations. The VS Code CLI guide explains custom user data directories.
Your projects may be using more space
If the drive is still full after clearing VS Code caches, the remaining space may be in your projects. node_modules, Rust's target, Gradle's build, and downloaded AI models aren't the editor's own cache.
Use MangoDisk's Disk Space Analysis to scan your project directory. Larger blocks represent larger files or folders. Follow those blocks to find the biggest space users instead of repeatedly clearing a few megabytes of cache.
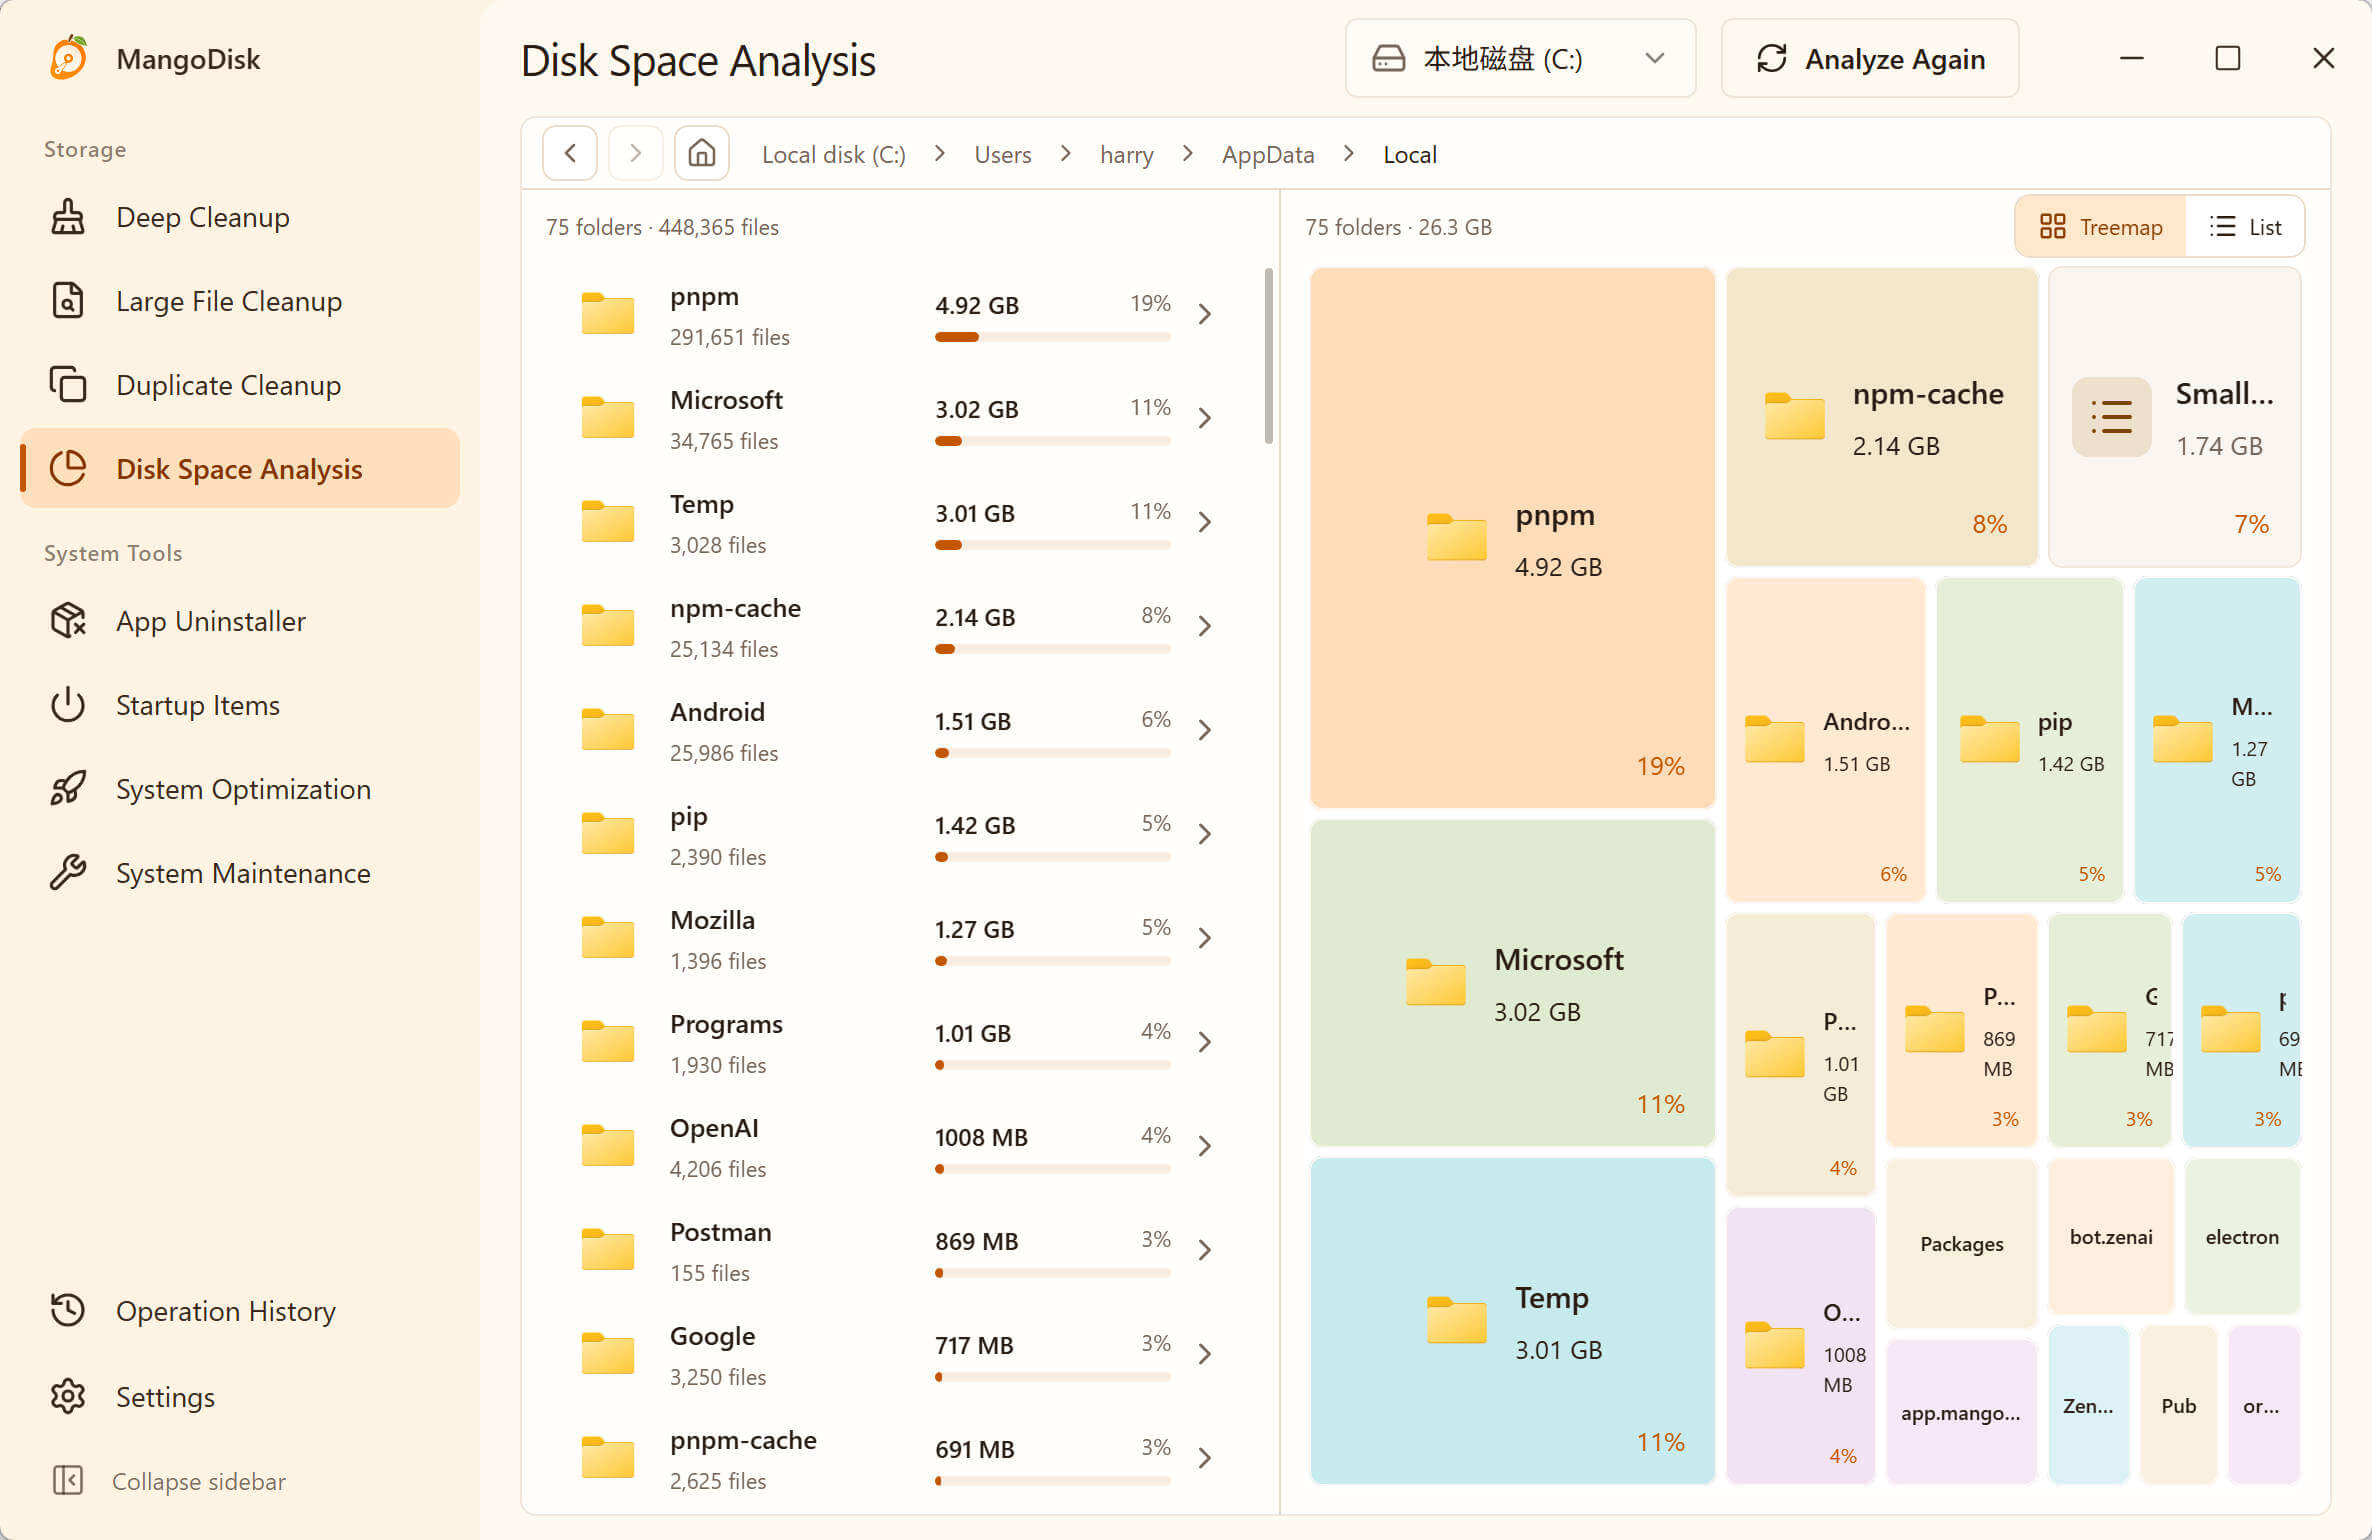
You can also review supported projects' dependencies and generated files under “Project build artifacts.” Keep source files and any installers or output files you need. See npm caches versus project dependencies and Cargo caches versus target folders for the differences.
Clearing caches can make the next launch rebuild some files; it isn't a promise that VS Code will run faster. If you have plenty of space, there's no need to clear them every time you quit.
Download MangoDisk to check VS Code and other supported development caches in one place, with less folder hunting. Free and open source, no signup or login, available for Windows and macOS.
More: Developer cleanup guides.