
How to Clear the Gradle Cache on Windows and Mac
Gradle cache taking up too much space? Use MangoDisk to compare development caches and build artifacts, check their paths, and clear what you can replace without deleting project files.

An old project is gone, but the dependencies Gradle downloaded and the caches it generated may still be on your drive. If you've worked on several projects in Android Studio or IntelliJ IDEA, your user-level .gradle folder is worth checking.
You can clear Gradle caches, but don't delete the entire .gradle folder. It can hold global settings as well as cached files. Your next build may need to download dependencies or regenerate data, so keep what you'll need for active projects—especially when working offline.
To avoid tracking down each cache folder, scan with MangoDisk first. You can compare Gradle's size with other development caches before choosing what to clear.
Find the caches worth clearing with MangoDisk
Open MangoDisk's Deep Cleanup, run a scan, and find “Gradle cache” under “Developer tools.” Expand the result to check its size and actual paths without having to remember where Gradle stores everything.
The same view lets you compare supported npm, pnpm, Cargo, and other caches. When space is tight, start with large items you can download or generate again rather than wiping every cache at once.
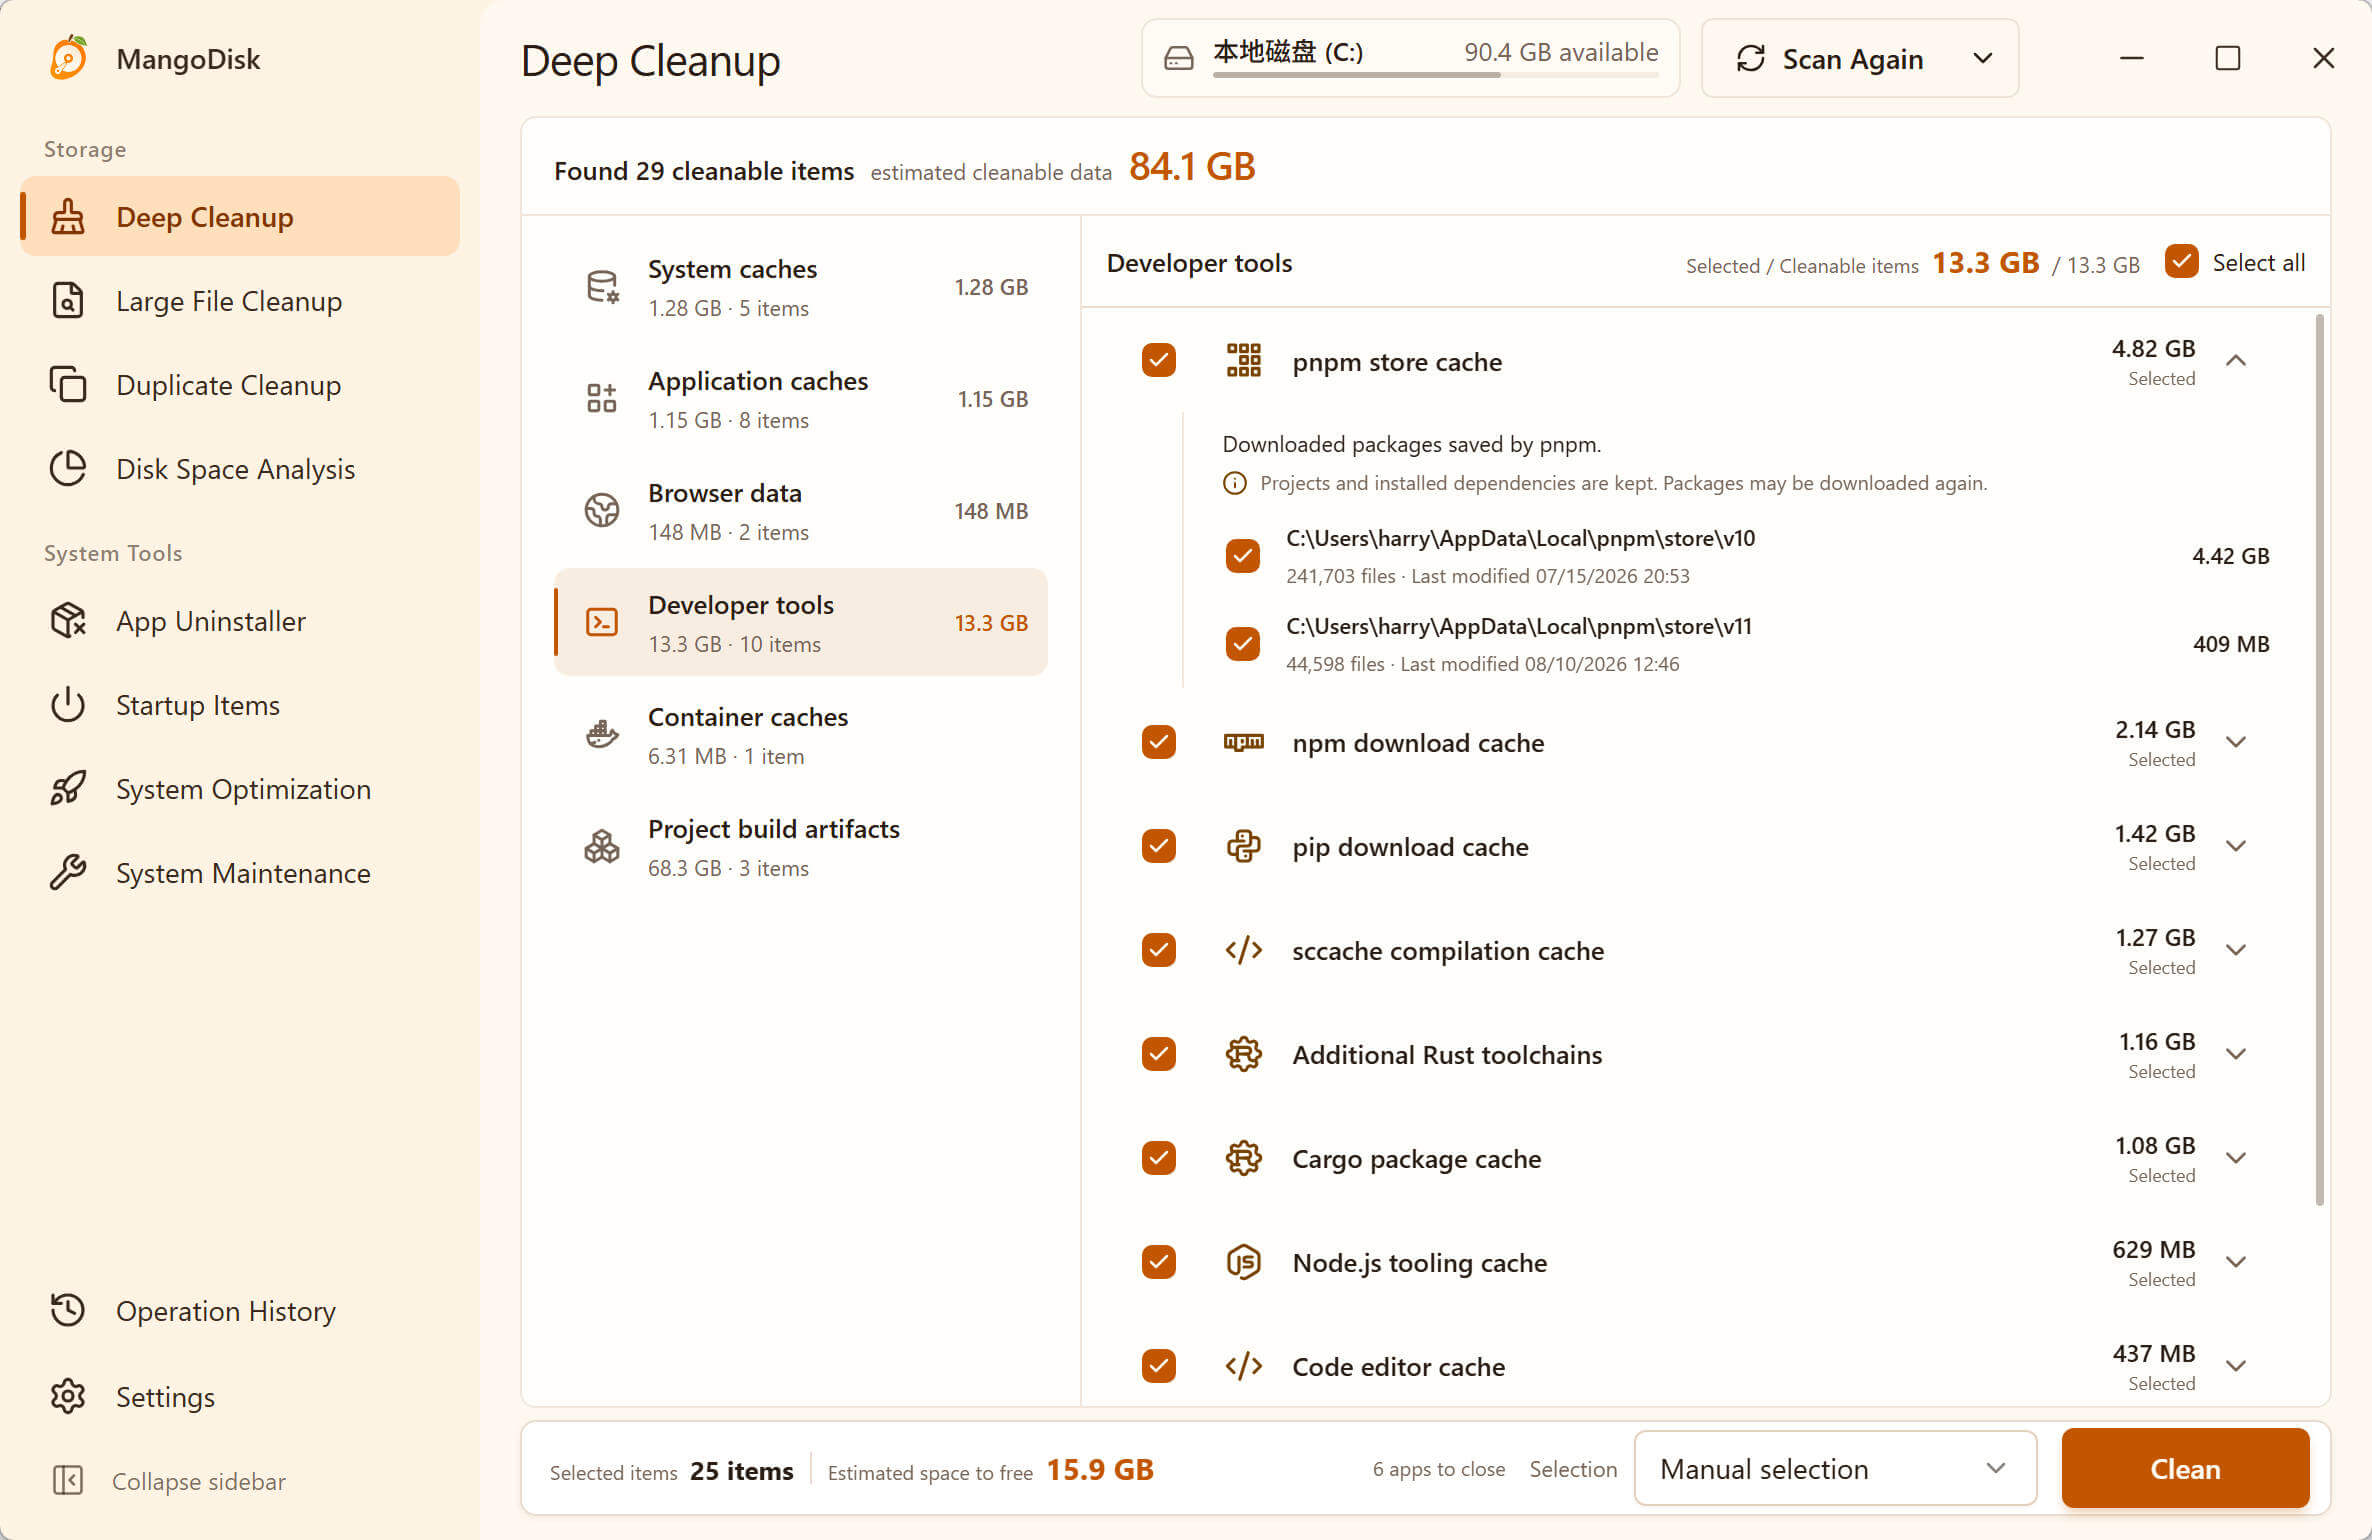
Before clearing Gradle files:
- Save your work, finish builds and syncs, and exit related apps such as Android Studio or IntelliJ IDEA. Close Gradle and Java processes as prompted.
- Deselect unrelated items and select only the Gradle cache you've checked.
- Review the selected paths and cleanup effects before confirming. Scanning alone doesn't delete files.
MangoDisk clears the selected cache locations; it doesn't decide which dependencies you'll need again. Deletion bypasses the Recycle Bin or Trash. Back up offline dependencies and anything you can't replace. See the cleanup safety guide for recovery limits.
On Windows, the Gradle rule covers caches, daemon, workers, and notifications. On macOS, it also covers downloaded Gradle Wrapper distributions and the .tmp folder. Project source, global gradle.properties, init.d scripts, and JDKs are outside this cache rule's scope.
Check the folder before deleting it manually
Gradle's default user-level locations are:
| System | Default directory | How to open it |
|---|---|---|
| Windows | %USERPROFILE%\.gradle | Paste it into File Explorer's address bar |
| macOS | ~/.gradle | Press Shift + Command + G in Finder and paste the path |
If you've set GRADLE_USER_HOME, use your configured location instead. MangoDisk's standard Gradle rule checks the default location, so a custom directory may not appear in the results. The Gradle directory guide explains which folders hold caches, configuration, and downloaded tools.
Close related apps before clearing files manually, too. Open the directory, check the size and contents of caches, then delete only the folder you've confirmed you want to clear—not the enclosing .gradle directory. Keep gradle.properties, which may contain proxy or repository settings; init.d, which may hold team scripts; and jdks, which contains Java environments used for builds.
Your project's gradle folder is different again. It usually contains Wrapper files. Keep it along with gradlew and gradlew.bat in the project root.
Why clean doesn't empty the global cache
gradlew clean normally removes a project's build output, not downloaded dependencies in the user-level cache. A successful clean can leave .gradle/caches just as large as before. Custom clean tasks can do more, so check your project's task definition before running one. See Gradle's explanation of clean.
If old projects' generated files are the problem, MangoDisk's “Project build artifacts” section can identify build and project-local .gradle folders in supported Gradle projects. Review them by project before clearing them. These are separate results from the global “Gradle cache” entry; the project itself isn't the cleanup target. Copy out any installers or reports you need to keep from those output folders first.
--refresh-dependencies isn't a disk cleanup command either. It rechecks dependencies and may reuse valid downloaded files; it doesn't empty the cache. The Gradle dependency caching guide explains the distinction.
Leave yourself ready for the next build
After clearing caches, the next build may take longer or need an internet connection. Keep relevant dependencies if you're about to work offline or can no longer download them from a company or older repository.
Gradle has its own automatic cleanup mechanism. You don't need to clear its caches after every build. Manual cleanup is more useful when space is tight, you've stopped working on some projects, or you've confirmed you no longer need a set of cached files.
Still short on space? Use MangoDisk's Disk Space Analysis to check your drive or project folders. Follow the larger blocks to see whether old projects, installers, or another tool's files are taking up more space.
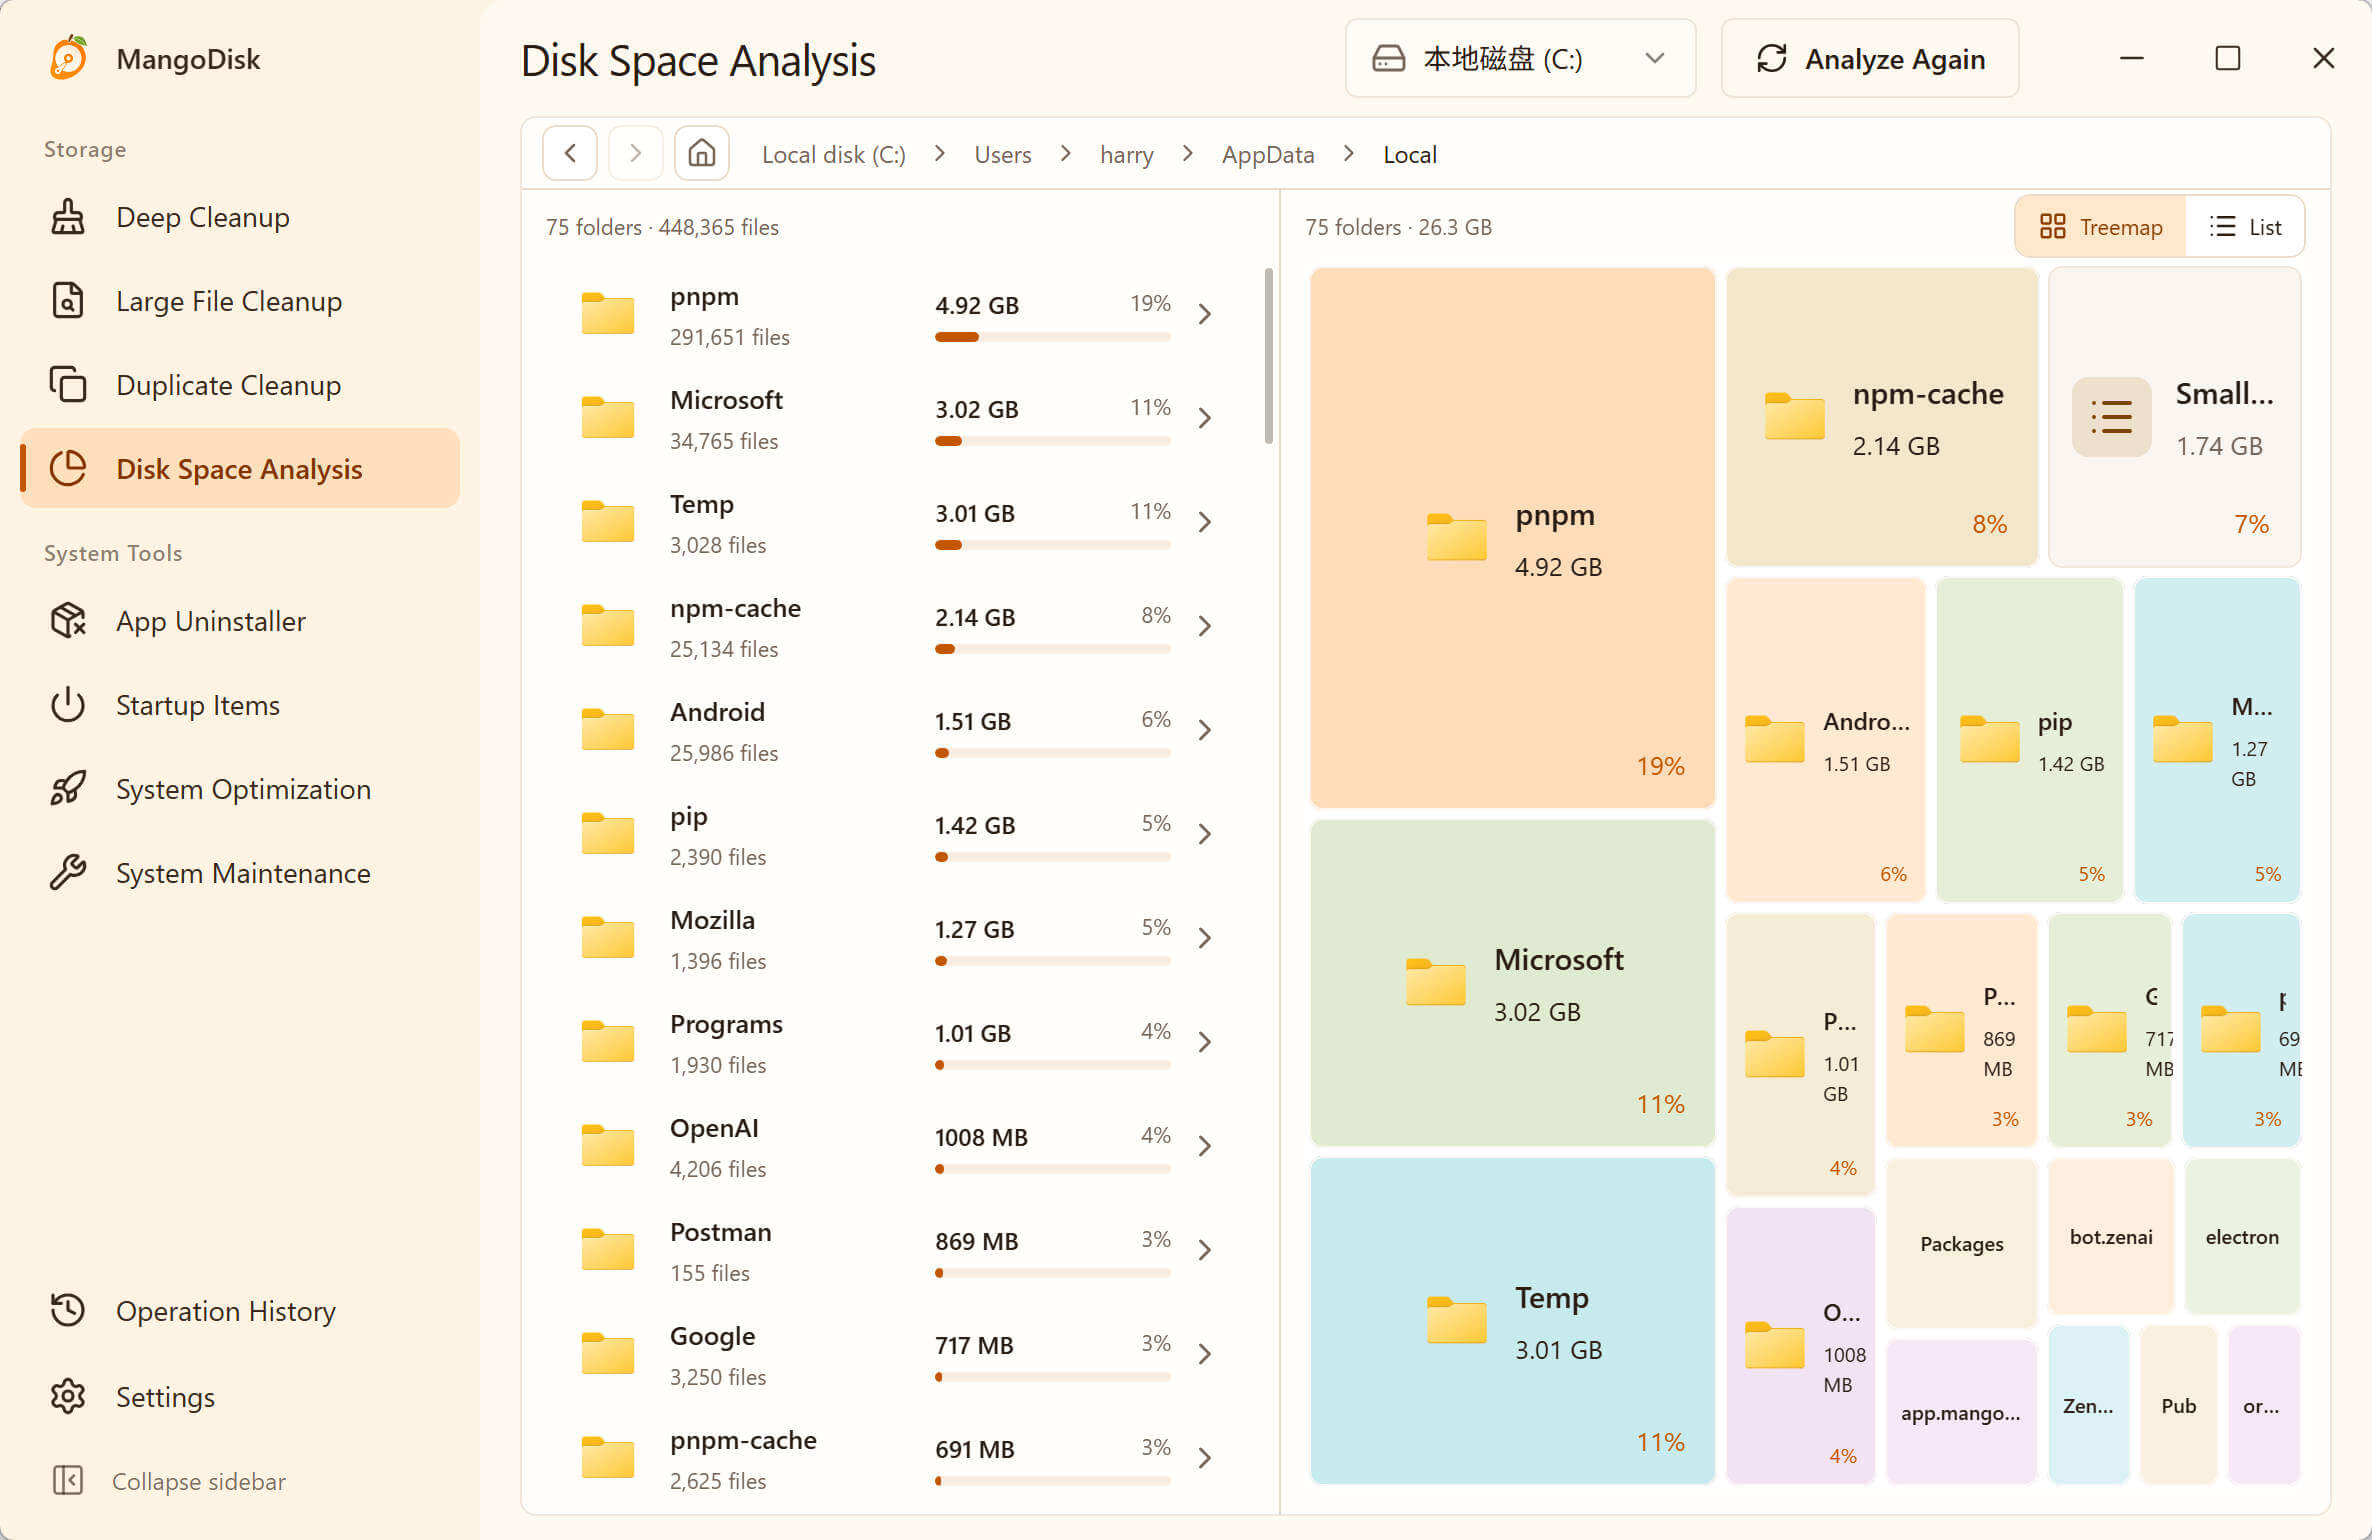
Download MangoDisk to review scattered development caches and build artifacts in one place. Available for Windows and macOS, free and open source, with no signup or login.
Related: Clear the pnpm cache · Cargo caches versus target folders · Developer cleanup guides